Sunday, December 9, 2018

December 2018 - Joyful Stars Blog Hop!

Welcome back to the Joyful Stars Blog Hop!  If you came here from the talented Betty's blog, thank you for continuing on here!

This month I'm focusing on a card using some of the cute Christmas items in our Holiday Expressions Idea Book.  As we tend to make lots of Christmas cards this time of year yet time is stretched due to all the additional events going on, I thought I would make this card, but also point out where corners can be cut to facilitate mass production.


For the top portion of the card, I cut a plaid piece from the 'Tis the Season paper packet and adhered to a White Daisy card base.  Next I cut 9 postage stamp squares from White Daisy cardstock using the Cricut® Artbooking Digital Collection.  I then stamped the 2 tree images from the Christmas Countdown stamp set in New England Ivy ink.  I adhered the squares using Thin 3-D Foam Tape, but to save time, they can simply be adhered straight onto the plaid paper.  Finally, I added some simple Clear Sparkles to the tops of each of the stamped trees.

For the bottom portion of the card, I cut a piece of the holly paper from the 'Tis the Season paper packet and adhered underneath the plaid piece onto the White Daisy card base.  I attached a piece of Candy Apple Striped Ribbon, centering it on the holly paper, and trimmed to the edges of the card.  I used the "FA" and "LA" images from the Christmas Countdown stamp set to create the sentiment.  These were stamped in VersaMark ink on White Daisy cardstock and embossed using the Ranger™ Red Tinsel Embossing Powder; however, to save time, the images can simply be stamped in a coordinating color, e.g., Candy Apple Red ink.  The sentiment was layered onto a scrap piece of New England Ivy cardstock, and attached with Thin 3-D Foam Tape to the top of the ribbon, but again, it can simply be adhered directly to the card to save time.

I hope these tips were helpful and that everyone is having a Merry Christmas and Happy Holidays!  Now please head over to Krista's blog to see her beautiful works of art!


Friday, November 9, 2018

November 2018 - Joyful Stars Blog Hop!


Welcome back to the Joyful Stars Blog Hop!  If you came here from the artful Betty's blog, thank you for continuing on here!

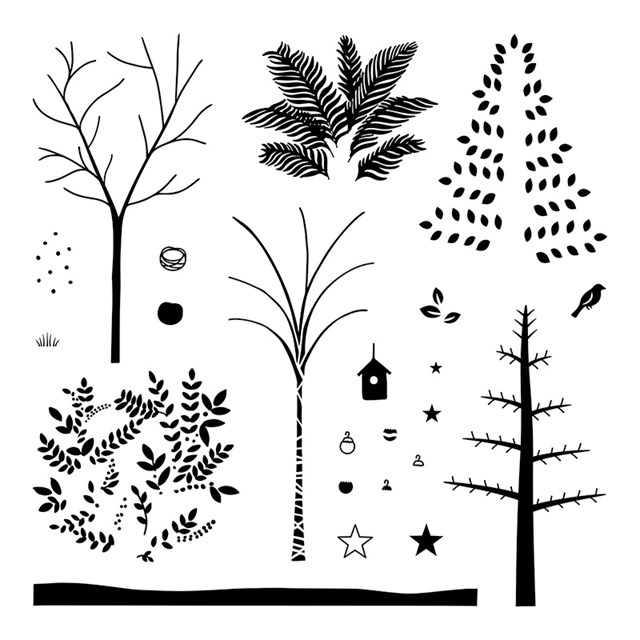
As I've been dying to have some fun with the November 2018 Stamp of the Month, Seasonal Trees, I decided to use that stamp set as the focus of my card this month.  As implied by the name, this versatile stamp set has trees from different seasons or climates.  Since we're quickly approaching the holiday season, I decided to make a Christmas card and proceeded with the approach of tradition over whimsy.


Upon first sight of the stamp set, I knew immediately I wanted to include Kraft Paper as a background for the tree.  I stamped the "bare tree" stamp in Espresso ink, then stamped the coordinating "leaves" stamp in New England Ivy ink.  To add "snow" to the tree, I offset the "leaves" stamp very slightly and re-stamped in White Daisy Pigment ink.  Then I grabbed the "snow" stamp and randomly stamped around the tree, again using the White Daisy Pigment ink.

Next, I free-hand cut some White Daisy Cardstock to make the "snow hills".  To add a bit of definition, I sponged a hint of Linen ink to the tops of the "hills".  Using Espresso ink, I then stamped the "'Tis the Season" sentiment from the Oh What Fun-Cardmaking stamp set at the bottom of one of the "hills", and layered the pieces on the Kraft Paper background.

To wrap up the card, I adhered the Kraft Paper background to a slightly larger piece of New England Ivy Cardstock and attached the whole thing to a White Daisy Card Base.  Using Pomegranate ink to add a pop of color, I stamped the "bird" image, fussy cut it, and used a tiny bit of Foam Tape to add it to the tree.  Finally, I finished off the card by cutting a small Cricut star from Gold Foil Paper using the Cricut Basic Shapes feature, and by attaching a few Gold Sequins with Liquid Glass.

Now head over to Krista's blog to see her beautiful work next!


Each month you can purchase a new D-size stamp set, available for one month only, for just $5 - that's over 70% off retail!  When you place an order of $50 or more in Close To My Heart products, you qualify for this special Stamp of the Month pricing.  Otherwise, you can purchase this set outright for $18.95.

Stamps

Tuesday, October 23, 2018

Grateful Heart Watercolor!


Working in the IT field, I have a natural affinity to black and white - things work or don't work.  The creative side of my brain does not come natural as I really have to work at it. So when it comes to watercolor, I find it more than daunting. However, I LOVE a lot of the beautiful art I see with watercolors, so I have been bound and determined to try my hand at it.

Here is a card I made with some very simple watercolor. I discovered two things:  first, I found that I do not need to spend a bundle on watercolor paints to be satisfied with the results, and second, I found the process very liberating! For this card in particular, I especially like the disparity between the clean lines and texture of the embossing and gold mat with the free-handed nature of the watercolor and texture of the watercolor paper. So if I can do this, maybe it will inspire those of you who struggle like I do.


To make this card, I stamped the foliage frame from the Grateful Heart - Scrapbooking stamp set with VersaMark ink on watercolor paper and embossed it with Ranger Princess Gold Embossing Powder. I taped it down to my craft sheet and wet a large portion of the paper around the edges with a large, flat brush and some clear water.  After choosing a warm yellow, orange, and red from my watercolor paints, I began dropping color with my brush around the perimeter of my paper, alternating between the three colors and doing a slight bit of blending.  I then left it to air dry.

While it was drying, I used the "So Grateful" sentiment from the stamp set by stamping it on VersaMark ink on a scrap of Black Cardstock, masking off the "So" from the stamp.  I then embossed again with Ranger Princess Gold Embossing Powder. I repeated this process using a leaf from the stamp set and then trimming it to the edge of the image.

At this point the watercolored piece was dry so I took my brush and using the same three colors, I spattered some paint onto the piece.  While letting this dry again, I took the time to prepare a piece of Gold Foil Paper for matting as well as cut a card base from Black Cardstock.

To assemble, I trimmed the edges of the watercolored piece and simply adhered it to the Gold Foil Paper and then to the black card base.  I added the sentiment strip to the card using Foam Tape and adhered the embossed leaf to the left of the sentiment.

Questions?  Leave me a comment and let me know your experiences with watercolor!


Tuesday, October 9, 2018

October 2018 - Joyful Stars Blog Hop!


Welcome back to the Joyful Stars Blog Hop!  If you came here from the talented Betty's blog, I'm sure you're smiling, and thank you for continuing on here!

As an empty nester, I have no young kids at home, so Halloween is pretty much a thing of the past for me.  However, I do love Halloween themed crafting supplies.  So I decided to make a card using Close To My Heart's new Halloween themed products, but made a 3-D card that will hopefully not be perceived as necessarily a Halloween card, KWIM?


First I prepared my card by cutting a standard size card base out of Black cardstock, then adhering a slightly smaller piece of the black diamond patterned paper from the Hello Pumpkin Paper Packet to it.  Next I used the Shaker Window & Confetti Thin Cuts to cut a circle from the star patterned paper from the Hello Pumpkin Paper Packet as well as the stitched line circle from a piece of Black cardstock.

For the stamping, I used the ghost and star images from the Hello Pumpkin - Scrapbooking stamp set to stamp and emboss them in black on White Daisy cardstock, then fussy cut them.  The sentiment was also stamped in Versamark ink on a scrap of Black cardstock, then embossed with Ranger White Superfine embossing powder.

To assemble the card, I adhered a foam circle from the Shaker Window Foam & Acetate to the card base.  I then used Foam Tape to adhere the embossed ghost to the window of the foam circle, overlapping it on the circle to anchor it.  I used more Foam Tape to then layer the star patterned paper and adhere the stitched black circle on top of the whole base.  The sentiment was then adhered just underneath the circle window.  The finishing touches included embellishing the inside of the window by popping up a few of the embossed stars with some Foam Dots, as well as some Clear Sparkles.

Halloween or not Halloween?  You be the judge!  Now head over to Krista's blog as I know she's all set to wow you!


Sunday, October 7, 2018

World Card Making Day and October Stamp of the Month - Thanks & Giving!


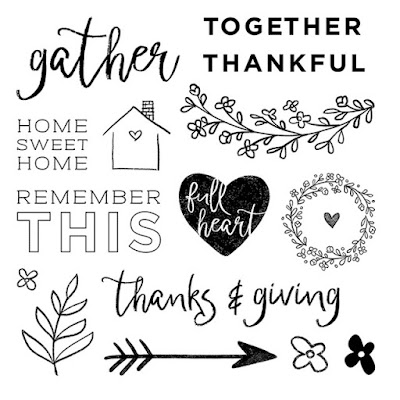
Today is World Cardmaking Day, so I thought I would take the opportunity to make a card with the cute October Stamp of the Month, Thanks & Giving!  The images are so cute, I had so much fun making this card!

First I stamped the garland image on a piece of White Daisy cardstock and colored with Shinhan markers.  Next I stamped the house image on a piece of polka-dot background paper from the Oh What Fun Paper Packet and cut it out.  I stamped just the chimney of the house on a scrap of Pixie cardstock and adhered it to the stamped house.  Using a punch to cut a heart from a scrap of Raspberry cardstock and Cricut to cut a small circle from Black cardstock, I adhered both pieces to the stamped house, placing a Bitty Sparkle on the tiny heart.  The Silver Embellishing Thread was just the right touch to turn the house into a "birdhouse" by "hanging" it from the garland "branch".

To wrap up the card, I attached another piece of the background paper to the left of the images.  Then I adhered the stamped cardstock to a piece of Black cardstock, and again to a cardbase made from Raspberry cardstock.  Finally, I stamped just the "Thanks" sentiment from the "Thanks & Giving" image with Versamark ink on a piece of Black cardstock and embossed it with Ranger White Super Fine embossing powder.  This was adhered with Thin Foam Tape to the card.


Don't you just love the polka-dot paper from the Oh What Fun Paper Packet?  Here is a closeup of the card.


Each month you can purchase a new D-size stamp set, available for one month only, for just $5 - that's over 70% off retail!  When you place an order of $50 or more in Close To My Heart products, you qualify for this special Stamp of the Month pricing.  Otherwise, you can purchase this set outright for $18.95.
https://joycegough.closetomyheart.com/ctmh/promotions/sotm/2018/1810-thanks-and-giving.aspx


Thursday, October 4, 2018

Operation Smile Crop Autumn 2018!

Operation Smile is a cause that is near and dear to my heart.  To see and hear about children, and yes, even adults, who have their lives changed for the better brings so much joy to my heart!  Close To My Heart is 100% committed to helping in the effort to make a difference.   My fellow consultants and I have joined in the cause by holding a semiannual crop solely to raise money for smiles.  This has been a fun day crop that we've been holding for the last year.

Our next crop is scheduled for Saturday, October 13, 9:00 am to 9:00 pm at the Hampton Inn in Dumfries, Virginia.  Here are the details:

  • Location:  Hampton Inn Dumfries Quantico, 16959 Old Stage Road, Dumfries, VA  22025.
  • Cost is $40 which includes lunch and snacks, 4' of crop space, and one raffle ticket.  Additional raffle tickets can be purchased for prizes awarded throughout the day.
  • Space is limited, so please register at www.paypal.me/LindaTaylor to guarantee your seat. 
  • We will have a tool table available with a Cricut Expression and Cuttlebug for your use.
  • Due to fire regulations and limited space, please be mindful when packing.  Please, no side tables or wagons.
  • If you cannot attend but would still like to donate to Operation Smile, you can still help!
Please consider helping us for this great cause!


Tuesday, September 25, 2018

September 2018 Stamp of the Month - Just Treats!


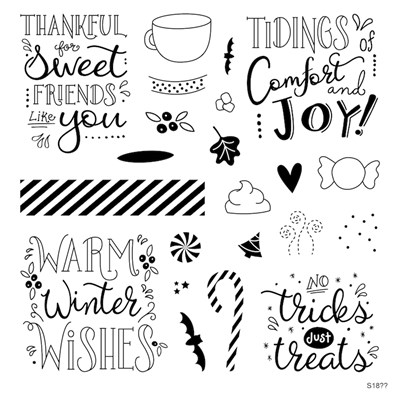
The September 2018 Stamp of the Month, Just Treats, features a multitude of very cute images and sentiments.  It is a great set to have for the upcoming holidays and seasons!

For the card I made, the "Warm Winter Wishes" sentiment became the focal point, which I stamped in Ranger Silver Super Fine Embossing Powder and layered on a square piece of Silver Foil Paper.  I wanted to play off of the winter sentiment, so used our new Stencil Sheets to make a snowflake stencil using the Cricut Artbooking Collection.  I then took the stencil, placed it on a white cardbase and smeared the new Ranger Opaque Matte Texture Paste over the stencil.  After letting it dry, I finished up the card with strips of the new Sugarplum Glitter Paper and Sugarplum Cardstock, and the new Sugarplum Glitter Gems.


Here is a closeup of the card.  What do you think of the new Close To My Heart Color of the Year, Sugarplum?


Each month you can purchase a new D-size stamp set, available for one month only, for just $5 - that's over 70% off retail!  When you place an order of $50 or more in Close To My Heart products, you qualify for this special Stamp of the Month pricing.  Otherwise, you can purchase this set outright for $18.95.

product image


Sunday, September 9, 2018

September 2018 - Joyful Stars Blog Hop!


Thanks for joining us this month for the Joyful Stars CTMH Blog Hop!  If you came here from the talented Betty's blog, you came from the right place!

This month, I'm focusing on the maiden month of the new 2018 Holiday Expressions Idea Book!  I've used a bunch of the new products from this book, so I hope you enjoy!  For the card shown below, I made the background on our new watercolor paper.  First, I inked up a CTMH acrylic block with the new Bluebird, Carolina, and Lilac ink pads.  Next I spritzed the block with a spray pen and pressed it onto a piece of pre-cut watercolor paper.  Then after placing something heavy on the block, I let it sit for about five minutes before lifting up the block.


To finish the card, I stamped the sentiment and garland from the Boutique - Scrapbooking stamp set with Charcoal ink onto the watercolored piece.  This was then placed on a piece of the new Sugarplum cardstock.  Next, I attached the Sugarplum matted piece on a card base with a piece of the new Boutique patterned paper adhered to the top of the base.  Finally, I used some simple Clear and Bitty Sparkles to finish the card to keep it simple and the focus on the watercolored area.
Now please head over to Krista's blog!  I promise you won't be disappointed!

Thursday, August 9, 2018

August 2018 - Joyful Stars Blog Hop!


Thank you for joining us on the Joyful Stars August 2018 Blog Hop!  If you've come here from the talented Betty's blog, you've come to the right place! 

Next month Close To My Heart is revealing some beautiful new products, including many for the holiday season.  That means that we will have to say goodbye to some of our favorites.  I decided to focus this month's blog hop card on some of my own personal favorites before they're gone.


 First, I stamped the beautiful background stamp from the retiring Heartfelt Thanks stamp set using VersaMark ink on Black cardstock, then embossed it in White Detail embossing powder.


Next, I pulled out my Blossom cardstock, which is also sadly retiring, to add a pop of color to the stamped background above.  The frame was cut from the Cricut Artbooking Collection, while the oval was cut from the Stitched Ovals Thin Cuts.


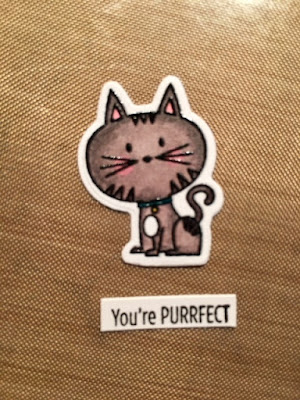
Then I grabbed my Punny Pals stamp set and Thin Cuts.  (Note that there will be a new stamp set to support Operation Smile in the new 2018 Holiday Expressions Idea Book.)  Punny Pals has definitely been a favorite stamp set of mine!  I stamped the cat with Memento ink (also retiring), colored with Shinhan alcohol markers, and embossed with VersaMark ink and Clear Detail embossing powder.  The corresponding Thin Cut was then used to cut out the image.


Finally, I pulled all the pieces together on a Black cardstock card base, putting Foam Tape under the stamped background and framed piece, and Thin Foam Tape under the stamped cat and sentiment.  A Clear Bitty Sparkle was added to the collar of the cat, and Clear Sparkles were put on the corners of the frame.  Here is the finished card:


Here is a closer look at all the embossing:


Questions?  Please ask in your comments!  Now please continue on to the talented Krista's blog!

Saturday, July 28, 2018

Floral Embossed Resist

Embossed resist is a favorite technique of mine and one of the first techniques I learned to do.  I recently took advantage of the Stampaganza special to get the Aloha Spirit stamp set.    This stamp set screamed embossed resist to me!


To make this card, first I stamped the flowers and leaves with VersaMark ink on a piece of White Daisy cardstock, then heat embossed with Clear Detail embossing powder.


Next, I used sponge daubers to blend ink onto each of the images.  I used Blossom and Raspberry inks on the large flowers, Lemon and Tangerine inks on the small flowers, and Willow and Emerald inks on the leaves.


After fussy cutting each of the stamped images, I prepared the card base.  Using a 4" x 5-1/4" piece of patterned paper from the Central Park paper pack, I used a large round object to trace and further trim down the paper and adhere onto a white card base.


Next I layered my cut images on the card base and after placing them in a pattern I was happy with, used Glad Press 'n Seal to pick up the pieces to retain their placement.


I then used adhesive and both thin and regular foam tape to provide varying levels of dimensions on the images.


After peeling off the release paper on the foam tape, I picked up the whole works on the Press 'n Seal and placed it back on the card base.  I added a few additional pieces of foam tape under the large flower images that were covered by the leaves when they were flipped to the back side.  The "Thank You" sentiment from the Shell Sentiments stamp set was stamped with VersaMark ink and heat embossed with White Detail embossing powder on a scrap of Pacifica cardstock, then placed on the card with foam tape.  Finally, a few yellow Central Park sequins were used to provide the finishing touches.


Questions?  Please ask in your comments!

Wednesday, July 25, 2018

July 2018 Stamp of the Month - Highlight Reel!

Highlight Reel is a versatile stamp set that has some very cute images of varying sizes.  I really thought the "First Home" sentiment the most unique so had some fun creating a couple of cards with those stamps.


The first card was made by stamping the house image multiple times in Memento Black ink with one stamped in Poppy ink.  I then used a journaling pen to outline the Poppy colored house.  Next I stamped the airplane and car with the Memento Black ink, colored them with alcohol markers, and cut them out.  I then used a Chalk Marker and ruler to draw the dashed lines through the center of a piece of Black cardstock to make the "road".  The "First Home" sentiment was stamped in VersaMark ink on Black cardstock and embossed with white embossing powder.  (Note that I needed to mask the word "First" since it is part of the banner image.)  The sentiment, airplane, and car were applied onto the Poppy-matted card with foam tape.  Finally, I added some sparkle with a Clear Shimmer Brush onto the airplane, car, and Poppy colored house.

Here are a couple of close-up photos of this card:


The Circle Thin Cuts helped to highlight the elements of the second card.  Using a pencil I sketched in some light pencil lines on a piece of Black cardstock to ensure my circles would cut evenly across the card.  I then used the cut cardstock as a guide to stamp my house images on a white card base in Cranberry, Tangerine, Lemon, Willow, Pacifica, and Pansy.  The cut cardstock was then attached to the card base using foam tape.  The banner and sentiment was stamped in Memento Black ink, fussy cut, and attached with foam tape to the card.  The card was finished off with some Clear Sparkles.

Here is a couple of close-up photos of the finished card:


Each month you can purchase a new D-size stamp set, available for one month only, for just $5 - that's over 70% off retail!  When you place an order of $50 or more in Close To My Heart products, you qualify for this special Stamp of the Month pricing.  Otherwise, you can purchase this set outright for $17.95.


Monday, July 9, 2018

July 2018 - Joyful Stars Blog Hop!

I have been given the honor of being asked to join the Joyful Stars CTMH Blog Hop!  Thank you to the lovely Joyce Houck for thinking of me!  This will be my first time joining a blog hop so I'm looking forward to stepping up my artwork as well as seeing some beautiful work by my fellow posters.  If you've come here from the talented Betty's Blog, you've come to the right place!

The card that I've created for July is actually a very simple one, but one that I hope would bring a smile to someone's face.  The sentiment can also be changed to one of sympathy and work well for this card.


Although the lighting isn't perfect, hopefully you can tell that the background has an ombre effect.  Many times CTMH comes out with a B&T paper in one of their paper packs with an ombre look which is lovely as a background for a scrapbook page.  I decided to try it for a card, and I thought it gave this one from the Adventure Fundamental Paper Packet (soon to be retired) just the right touch!  The additional background piece, i.e., the scalloped frame comes from the Cricut Artbooking Collection.  I simply cut this frame out three times in White Daisy cardstock and layered them on top of each other to provide dimension.

For the centerpiece of the card, I used the Cricut Flower Market Collection.  This has been by far my favorite cartridge ever!  The choices and details on so many of the flowers are just right up my alley and provide me with so much inspiration.  Obviously this is a tulip from the collection, and I used Raspberry, Blossom (soon to be retired), and Willow cardstock to cut the flower and pop it with foam tape.  The sentiment, stamped in black, comes from the beautiful Thoughtful Bird stamp set.  Finally, I used white dots from my favorite embellishment, Black & White Dots, to add a subtle touch to the card.

Here is a side view of the card so that you can see the layers.


Next up, check out our next talented blogger on the hop:  Krista's Blog!